How to Make Clear Ice
I’ve read dozens of articles explaining how to make clear ice. Some articles will claim that you have to use distilled water to get clear ice, while others claim that it can be tap water as long as you boil it twice. In addition to the various water types, there are numerous ice molds available, most with corresponding marketing photos showing perfectly crystal clear ice. However, unless these molds incorporate one key technique, the photos are faked.
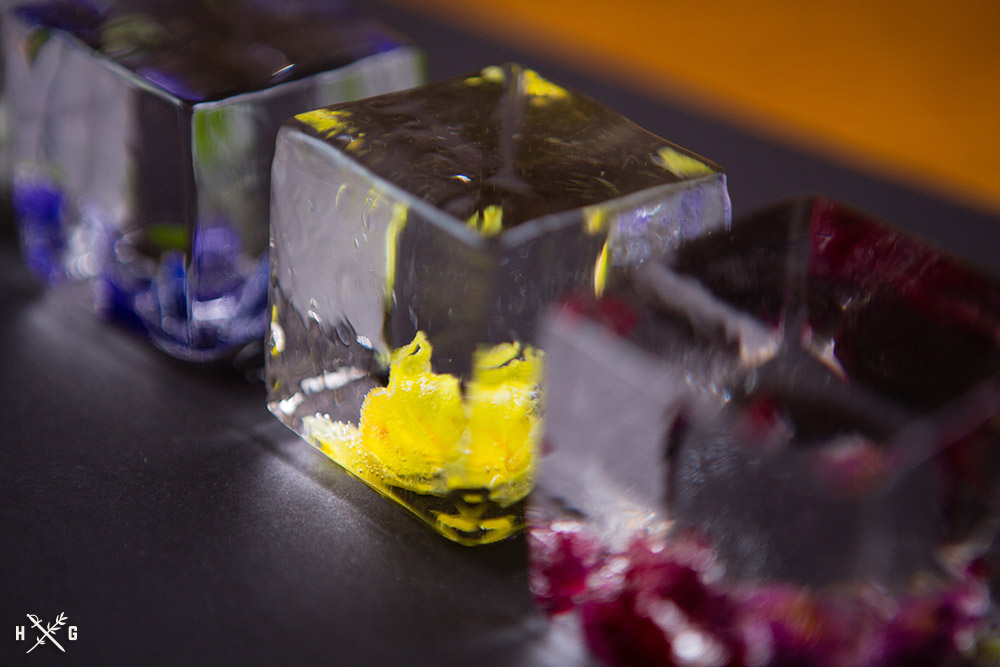
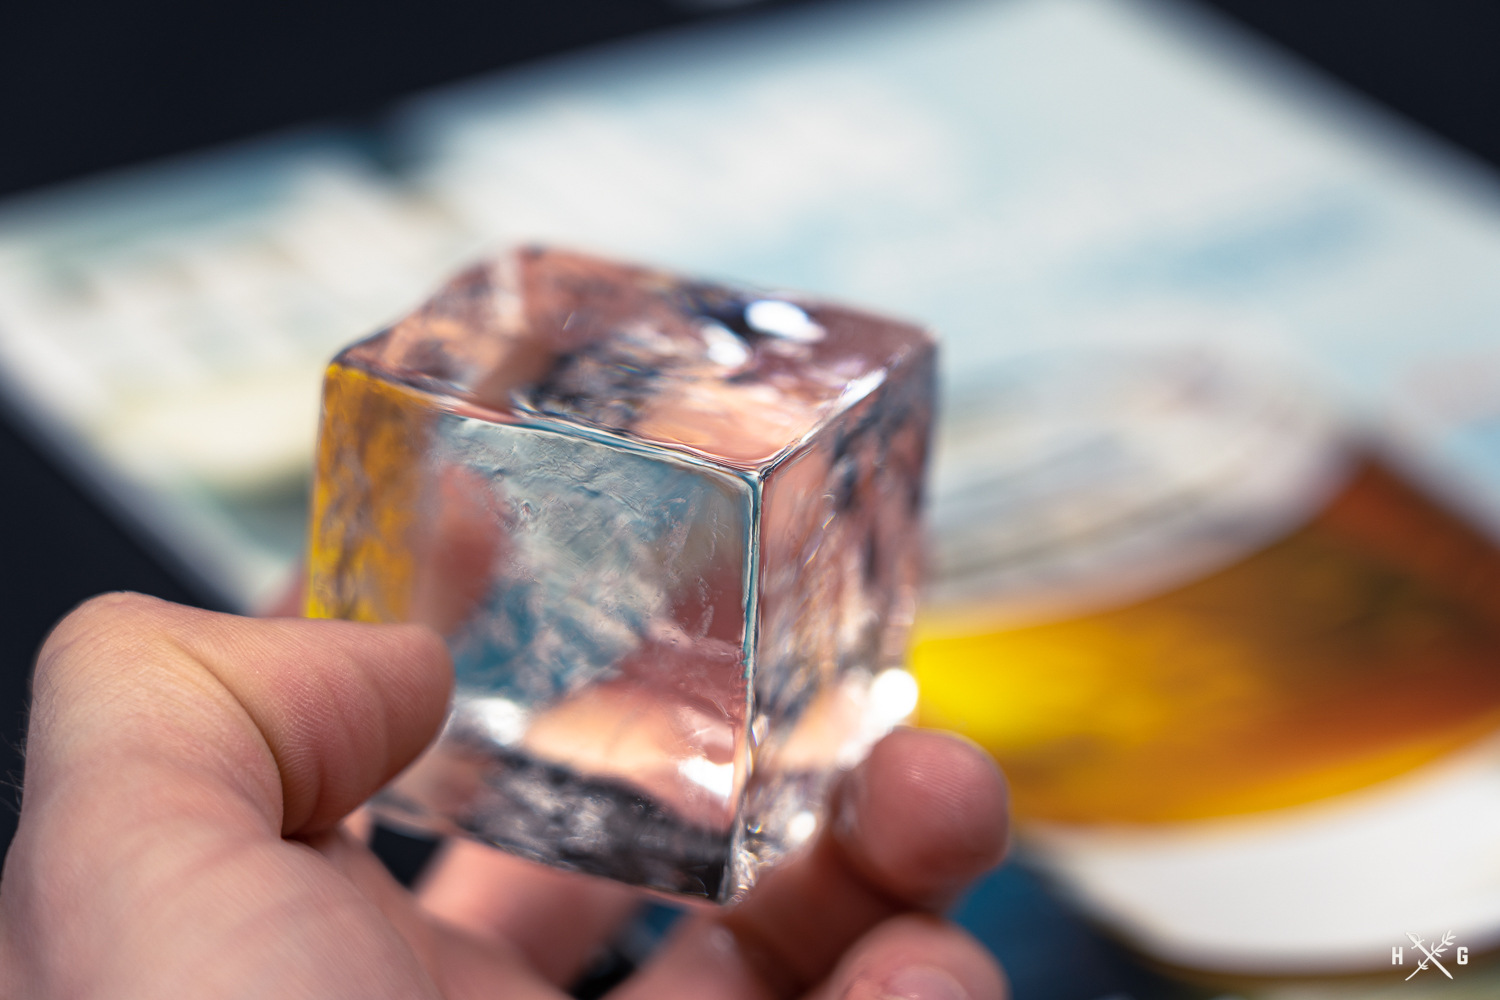
Since the dawn of the cocktail renaissance, enthusiasts have lusted after the beautifully cut, clear cubes adorning their old fashioneds and sazeracs at craft cocktail bars. Whether you’re new to cocktails or a longtime enthusiast, by the time you finish reading this post you’ll have a better grasp of the how clear ice is made, options for making clear ice at home, as well as one of the best visual illustrations of the process I’ve ever seen. The same process used to create clear ice can even be adapted to freeze flowers, mint, and other garnishes inside.
There is a lot of science to unpack, so if you just want to know what ice mold to purchase, scroll towards the bottom of the article where you’ll find my specific clear ice mold reviews I’ve also included a comparison table.
Table of Contents
- How to Make Clear Ice
- Ice Molds that Failed the Clarity Test
- Clear Ice Molds that Passed the Clarity Test
- Visual Results Based on Water Type
- Taste Test
- Conclusion (Featuring the Top Clear Ice Molds)
- Comparison Chart
- White Negroni Recipe
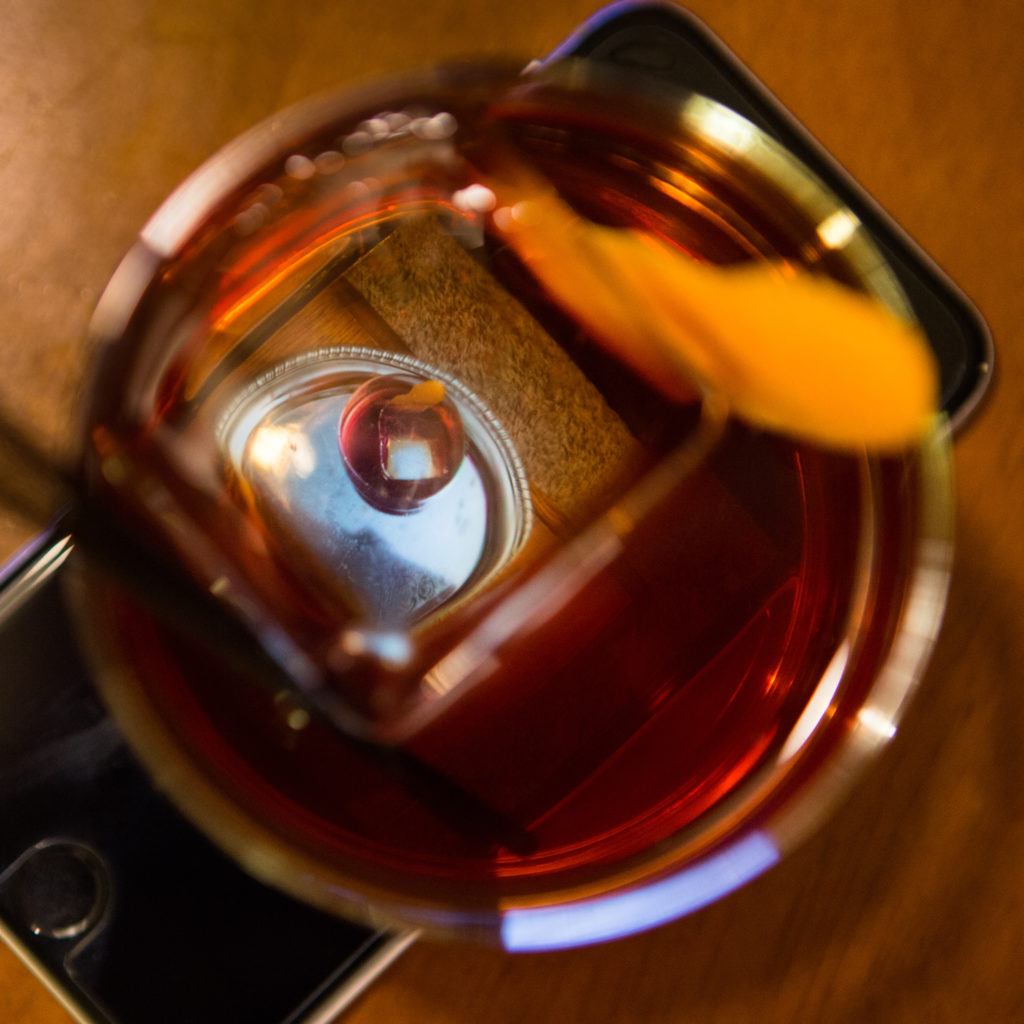
There are a few reasons that clear ice is desirable, and I’d argue that the largest reason is simply aesthetics. A cocktail with a large clear ice cube or several smaller clear ones is more appealing than cloudy ice. One frequently mentioned point is that larger ice cubes will dilute drinks slower than smaller and more imperfect ones due to having less surface area, but this is only a partial truth. The reason that smaller pieces of ice appear to dilute a drink faster is because there is more liquid water on the surface of the ice. The ice itself has no more or no less chilling power, but ice with greater surface area will bring a drink to equilibrium faster.
The commonly suggested methods for making clear ice at home are also full of partial truths, and will never allow you to create clear cocktail ice like you’ll find in bars with ice programs. To understand the reason for this, it’s important to understand some of the unique properties of water. First and foremost, the property of water that enables the process of creating clear ice is known as the “anomalous expansion of water”. This simply means that water is an anomaly in that it expands rather than contracts when freezing. Anyone who has put a bottle of water (or worse, soda or beer) in the freezer and forgotten about it has experienced this phenomena in an unpleasant way. This is because water expands in volume by around 9% when it goes from a liquid to a solid.
To better understand what makes clear ice, we need look no further than nature and the way lake water freezes. The water in a lake is insulated by the earth on all sides except for the surface where it can begin to cool. Water is most dense at around 4° C (39.2° F), but once the surface drops to 0° C (32° F) it can begin to freeze.
Water will supercool to 0° C or colder, but won’t begin to freeze unless ice crystals are already present or there is an impurity present for the crystals to begin to form. Since ice is less dense than liquid water, it floats on the surface of the lake and the impurities are forced downward with the denser water. Not only does this particular process facilitate the creation of clear ice, but the speed at which the water freezes plays an important role. This is why boiling water can slightly improve the clarity of ice – because the water is still warm and will take longer to freeze. Boiling the water will also release trapped gases, but not enough to make crystal clear ice.
The most important factor is being able to slowly control the direction of the freeze so that the impurities have a place to go besides the center of the mass.
When freezing slowly, ice crystals force the impurities away, but if freezing occurs quickly these impurities can become trapped, resulting in cloudy and cracked ice.
For commercial-grade large cube ice used in restaurants, bars, and ice sculptures, the Clinebell machine is the standard. This machine slowly freezes the water while simultaneously circulating it. The result is that all the impurities are forced out and you are left with a crystal clear 300-pound block of ice. This is great if you have $5,500 dollars for a Clinebell, a way to hoist out the ice, and then a place to store it. Let’s not forget a chainsaw to cut the block down into manageable sizes. In recent years, Clinebell has released some newer models aimed at a bar’s in-house ice program. These machines range from $4,000 – $5,000 and produce ice in 25-pound blocks.
For a smaller restaurant or bar, the Ghost Ice system may be an affordable solution. The Ghost Ice trays fit into a standard Coleman cooler. At $300, it’s pricey for two silicone trays, but it’s far less expensive and more efficient than other options. The Ghost Ice tray makes 48 cubes that are up to 3″.
Consumers looking to purchase a new refrigerator, could opt for LG’s Craft Ice model that runs about $4,000. Luckily, there are more practical methods for home enthusiasts, each of which have varying degrees of quality.
Even though this topic has been tested by numerous individuals (most exhaustively by Camper English), I needed to conduct the experiments for myself and add one more variable. (Be sure to check out Camper’s 2023 book, The Ice Book!) I gathered up the numerous ice molds and trays that I’ve accumulated over the years, which included those by Tovolo, OXO, Dexas, True Cubes, and more.
I also conducted some tests with the directional “cooler method”, but discontinued that particular method as the results were the same as using any of the molds that use directional freezing, and because freezing each large block of ice takes at least 3 days, plus the time to hand-cut the cubes.
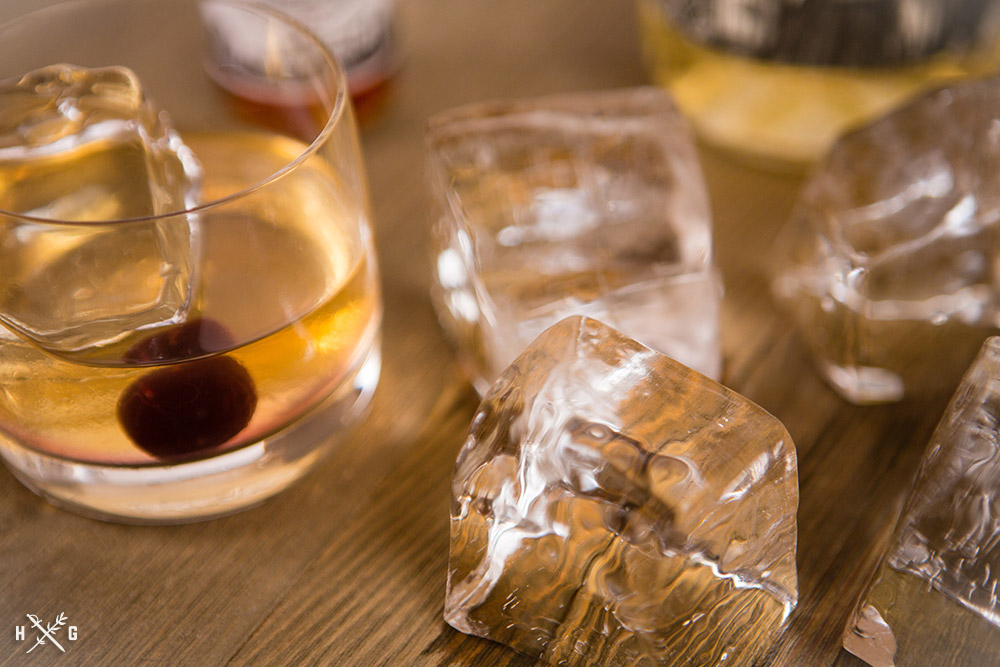
I tested both cold and hot versions of tap water, purified bottled water, Brita filtered water, distilled water, and alkaline water with trace minerals. My process for the hot water was to boil it, then let it cool slightly before putting it into the molds and freezing it. While I was thorough with the process, there are additional variables to consider such as the humidity, temperature of the freezer, temperature of the container, and temperature of the water when it was placed in the freezer. These are variables that I did not measure or control, and, unless you are Dave Arnold or creating ice in a laboratory, I doubt you would either. After all, this guide is for cocktail enthusiasts looking for a practical way to get clear cocktail ice at home. It’s simply not practical to measure all these variables every time I want to make ice.
In other words, I subscribe to the method that Tim Ferriss touts as the “minimum effective dose”. There is a point of diminishing returns, and I’d rather be enjoying cocktails with company than cutting ice.
The Contenders – An Ice Mold Review (Updated for 2023)
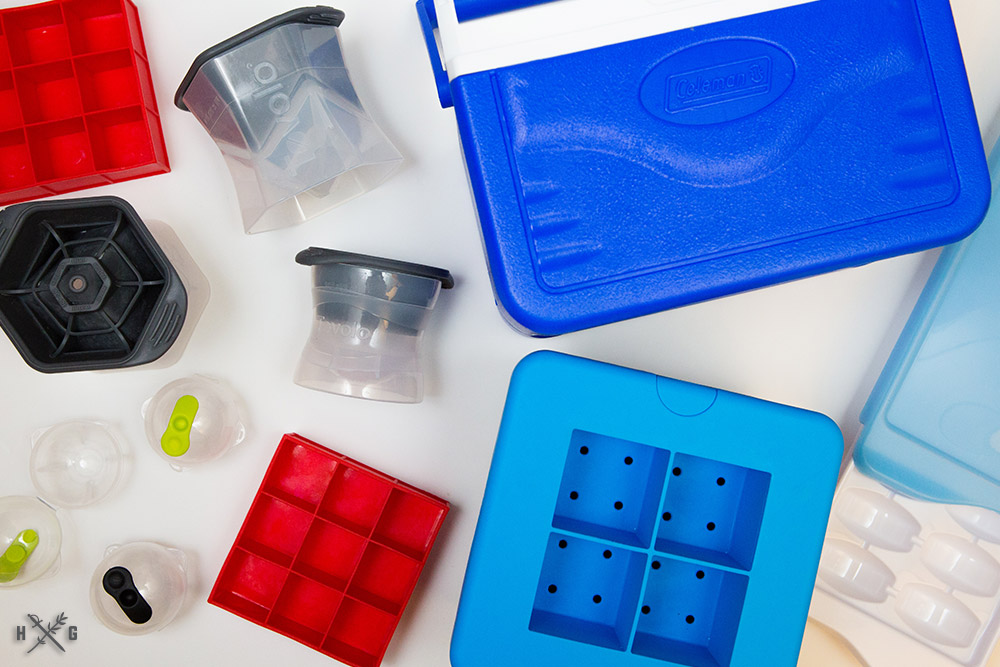
Here are the quick stats on the various molds I used in the tests. There are a few other molds out there that I discovered in my research, and they are linked at the end of this post. It’s noteworthy that Tovolo has stepped up their game and created some insulated molds. (Linked at the end of the post too.) If you want to specifically make ice spheres, the method is still the same—it has to be directional freezing. Wintersmith’s Phantom Mini is the best mold for clear spheres, and I’ve recently added it to this review. Cocktail Kingdom also offers a nice bronze device for making ice spheres, but they’ll be cloudy unless you’re starting with a clear cube.
Molds That Don’t Pass the Clarity Test
Below is the rundown of the molds I tested for the sake of being thorough. There is only one insulated mold on this list that didn’t perform well enough to pass. My suggestion is to get the basic OXO model and use it to create shaker and stirring glass ice, not presentation ice.
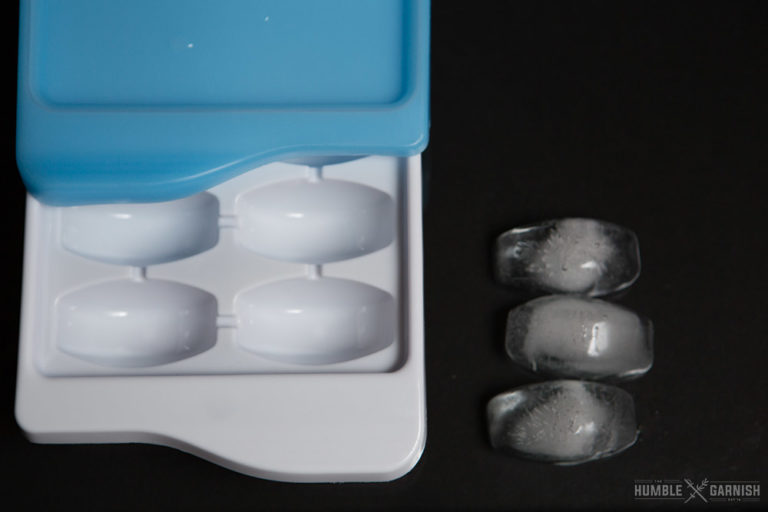
- OXO
Price: $6.95
Ice Size: 2″ (crescent)
Description: A traditional style ice cube tray, which creates 14 pieces of crescent-shaped ice. The design makes it very simple to remove ice from the tray and the sliding cover helps protect the ice from getting a freezer burned flavor. This is my preferred method for creating cocktail shaker ice if I’m not purchasing bagged ice. The OXO is your standard home ice tray. - Dexas Silicone Cubes (discontinued)
Price: $20.33 (2-pack)
Ice Size: 1.25″
Description: This silicone mold creates 6 cubes, each 1.25” in width. This is a great size for general use cubes. (Dexas now offeres a range of directional freezing ice molds.)
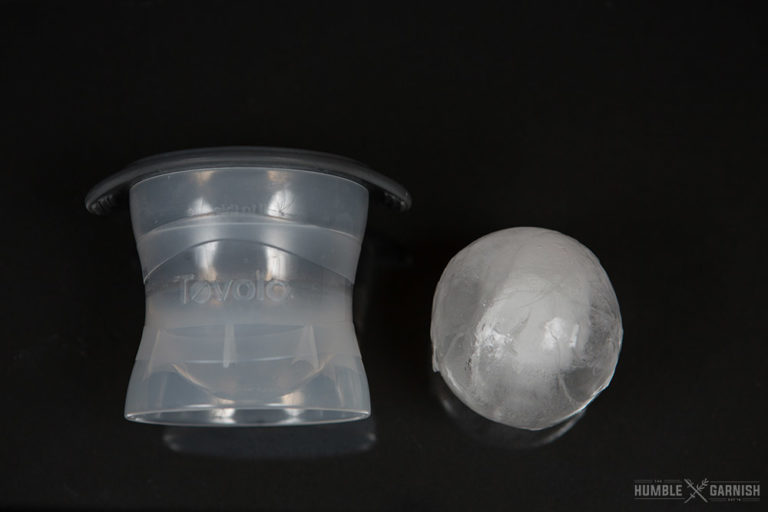
- Tovolo Sphere
Price: $11.99 (2-pack)
Ice Size: 2.5″
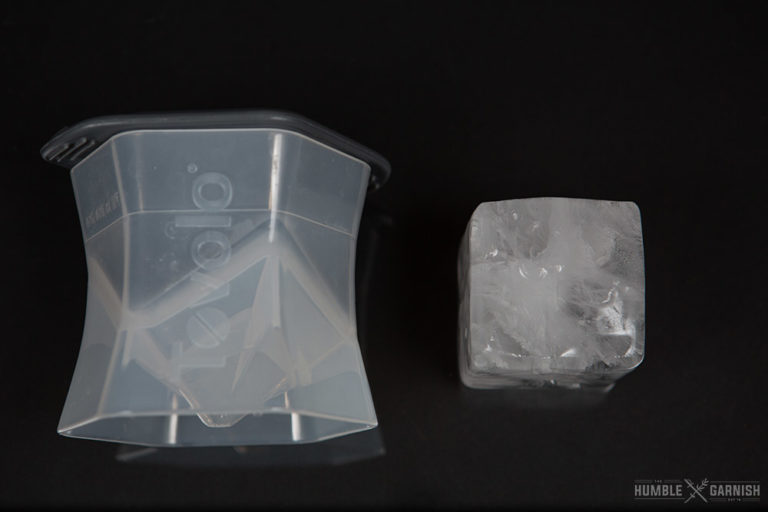
Description: I tested two Tovolo ice molds, the sphere and the cube. They both work the same way. There is a solid plastic base with a fill line. There is a cap made of silicone that slides on top and inside of the base. They both make large-sized cubes, but they are covered in cracks that are no good for presentation. - Tovolo Colossal Cube
Price: $15.99 (2-pack)
Ice Size: 2.25″
Description: See description above for the Tovolo Sphere mold. This is the same mold, just a different shape.
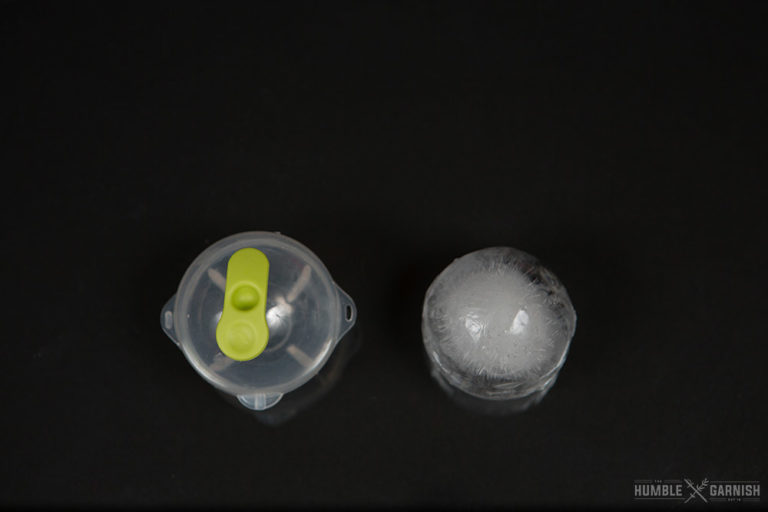
- Prepara Ice Spheres
Price: $9.99
Ice Size: 2″
Description: These are smaller spheres with a clam shell design. You fill up the ice mold through a hole in the top. The hole is capped with an attached silicone stopper. Very cumbersome to use. - Eparé Ice Mold (discontinued)
Price: $39.95
Ice Size: 2″
Description: I had high hopes for this mold, but it didn’t quite perform as well as I had hoped. The compact size is a nice feature, but I think that’s partially the other reason that it was unable to create ice as clear as the other contenders. The fact that each cube’s section has an additional plastic divider likely didn’t help either. I do like the feature on the bottom of the mold that allows you to easily eject the cloudy ice meant to be discarded.
The Best Molds for Clear Ice
- True Cubes
Price: $44.98
Ice Size: 2″
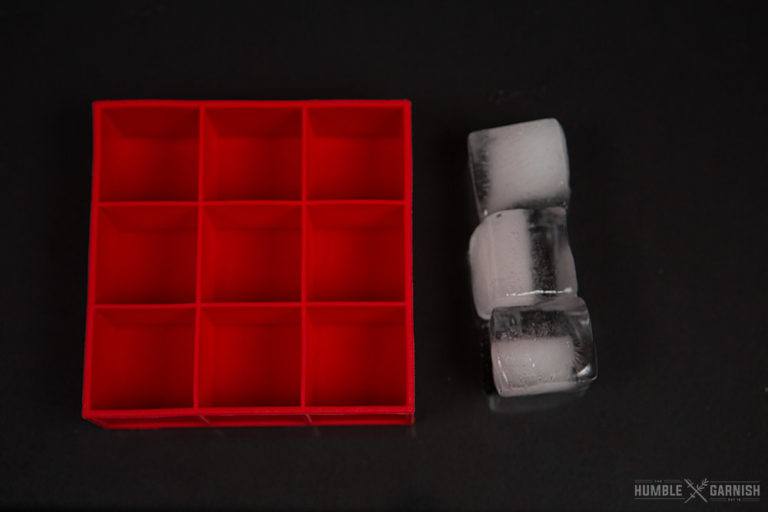
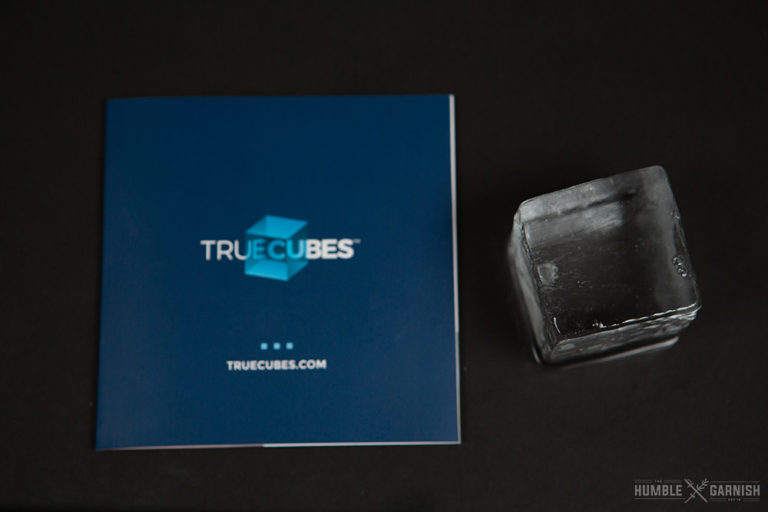
Description: This is one of the better systems that offers directional freezing. This system has three pieces – an insulated portion, a silicone reservoir, and a silicone insert that fit inside the larger reservoir. This system creates 4 cubes in the top tray, while the cloudy ice forms in the lower region and is discarded. The cloudy portion could also be used as shaker tin ice. (I have used this mold non-stop for several years.)
- OnTheRocks
Price: $65.00
Ice Size: 2″
Description: This is one of the latest molds that I have reviewed, and it’s a new favorite. The OnTheRocks mold produces 6 cubes and the mold is only slightly larger than the True Cubes mold. The silicone insert has numerous holes that make the filling process quicker. The tapered design of the clear plastic insert also makes removal quick and easy. (A favorite design feature.) Additional shape trays like spheres and diamonds can also be purchased.
Overall, I consider this to be a very well-engineered product. It’s on the pricier side, but in addition to other shape options it creates more clear ice cubes than most other systems.
One definite perk is that you can buy the cube and ice sphere kit as a bundle for $80. - ClearlyFrozen
Price: $39.99
Ice Size: 2″
Description: There is so much to like about the ClearlyFrozen system that I’m not sure how it took me so long to be made aware of it. This directional freezing system will give you clear cubes, but offers no fancy aesthetics. While I’ll leave the value of those aesthetics up to you, there is something to be said for one of the most inexpensive clear ice molds making 10 cubes at once. That’s 2-3x more cubes than their closest competition.
While it’s a decently built product, it may require more delicate care than other models that are made of solid plastic or stainless steel.
The hard plastic liner that holds the silicone mold itself can be prone to cracking, so be sure to remove the silicone insert before the water is frozen all the way through. With any directional freezing mold it will be easier to remove the finished cubes if you don’t let it freeze completely, however, not doing so with the ClearlyFrozen could result in damage. Also be sure to not allow water to get between the primary plastic liner and the foam exterior. This makes it challenging to remove once frozen, and could result in damaging the foam. I have noticed that there are also occasions where the two middle cubes will expand further outward and become a bit cloudy. (Scroll down to the conclusion of this post for reference photos.) - Wintersmith’s Phantom Mini
Price: $85
Ice Size: 2.36″ and 1.11″
Description: Wintersmith’s has been in the clear ice business for awhile, and they make some of the more expensive models available. Personally, I’d stay away from their Styrofoam shell products and opt for the stainless steel options. (Occasionally, their Amazon inventory gets low.) Their Phantom Mini is a solid choice that makes 3 large ice spheres and 3 very small ice spheres. Their flagship model, the Phantom, is modular and allows the user to change the silicone inserts to create different shapes. However, this system is pricey at $100, plus $40 for each silicone mold you want. - “Cooler Method”
Price: ~$30 (You’ll need a cooler, a bread knife—a wooden mallet and ice pick are good additions too. Links at end of this article.)
Ice Size: One benefit to this method is that you choose the size. If you’re willing to spend the time, you can make whatever size of ice cube you need.
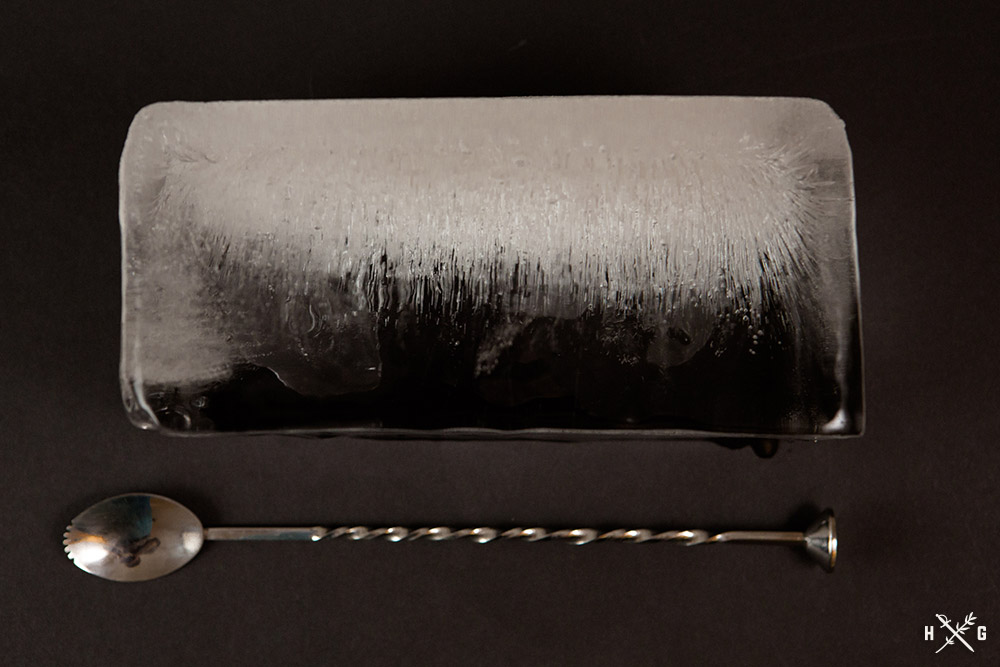
Description: This is the directional freezing method devised by Camper English. This “hack” uses a small cooler with the lid removed to facilitate directional freezing. It has been my preferred method for “presentation ice” for over a year, and has been the only way I’ve been able to achieve perfect ice. The downside is the amount of time involved. It takes 2-3 days for the large quantity of ice to freeze, then it takes at least another hour to cut down the ice once you include time for allowing it to temper. If you don’t let the cooler freeze all the way, there should be minimal cloudiness to cut off. If it does freeze completely, simply cut off the cloudy portion. While this method does take time, it consistently has produced great results. However, it’s a rare person that is willing to spend the time required to create clear ice with this method. I would suggest using this method to create a large block of ice for a punch bowl.
The Visual Results Based on Water Type
As previously mentioned, the freezing method has a greater impact on the clarity of the ice than the type or temperature of water. For methods that include standard molds, the freezing effect is so isolated to that particular portion of the mold that it becomes difficult to discern the results – cloudiness, gas streaks, cracks in the ice will all be present in every cube.
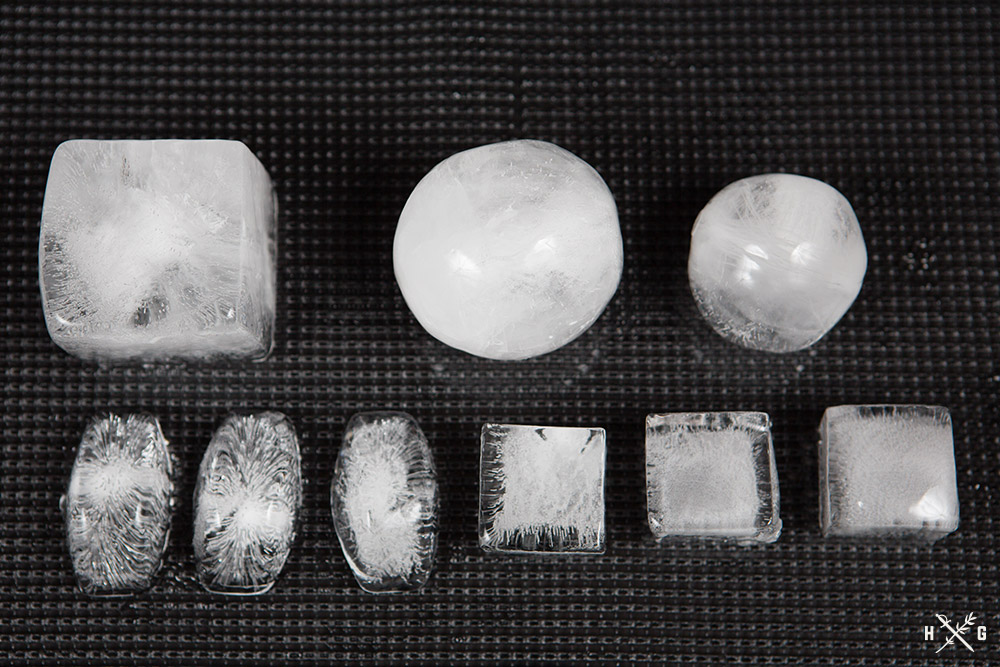
Summary of Ice Clarity Results Based on Water Type
Tap Water – This yielded good results. There was about 1/4” of gas bubbles in the True Cubes sample, but no cloudiness.
Tap Water (Boiled) – This yielded crystal clear results. No cloudiness or gas bubbles.
Brita Filtered – Surprisingly, this method produced a fair amount of gas bubbles. The only method that created more was distilled water.
Brita (Boiled) – There were still some gas bubbles in this sample, but there were less than in the standard Brita sample.
Distilled – This method had the most gas streaks. The result wasn’t cloudy, but it was littered with the longest gas bubble streaks across the entire cube.
Distilled (Boiled) – Better than standard distilled water, but not great. The Tovolo Cube mold showed one of the craziest streak patterns with this water type.
Purified Bottled – This produced the most cloudy result of any method. There weren’t really any gas streaks, but there was concentrated cloudiness in the center of the cube.
Purified Bottled (Boiled) – As was the norm in all methods, boiling this water did reduce the amount of cloudiness.
BLK Fulvic Mineral Water – Now this is fascinating, and the perfect example. This method was one of the clearest. Despite the BLK water literally being black from the fulvic trace minerals, the minerals were for the most part removed from the clear portion of the ice. There were little to no gas bubbles in the ice. The “waste ice” from this sample is stunning and the perfect illustration of how directional freezing works.
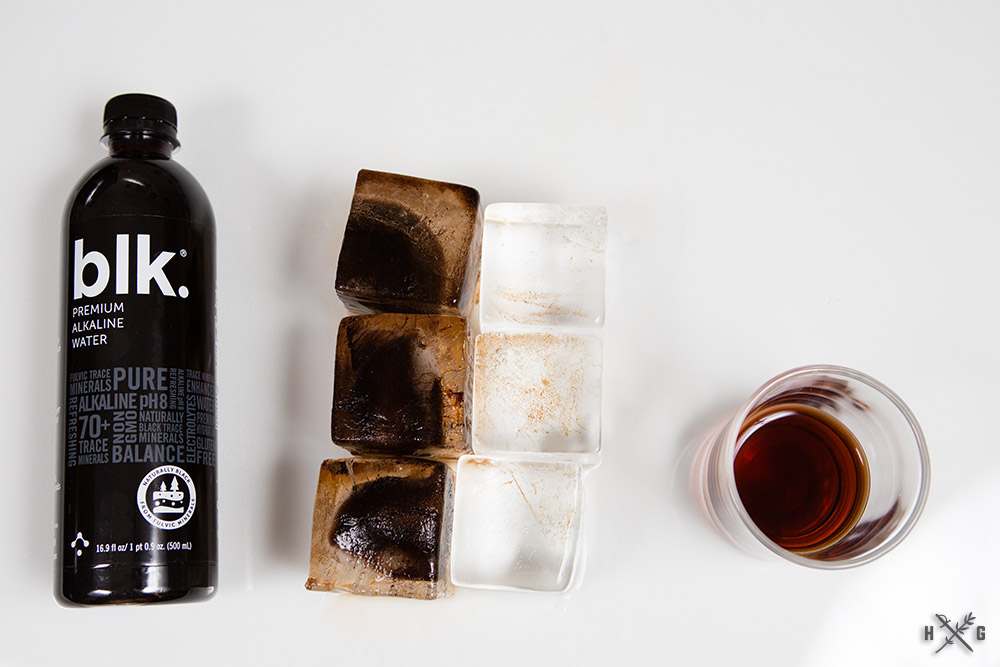
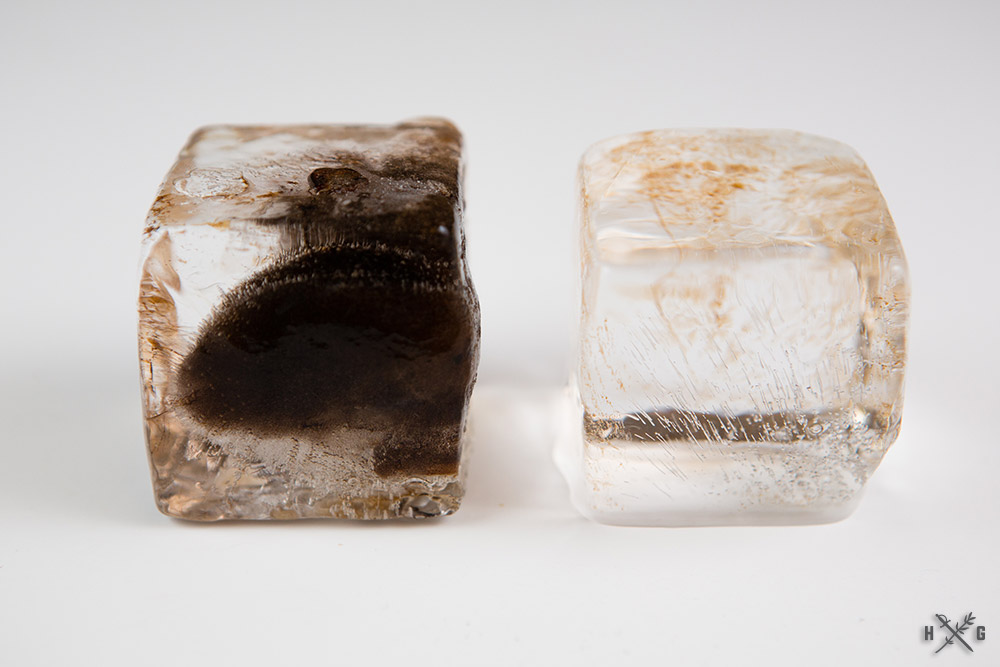
To summarize these visual results, any of these methods will create clear ice that will dazzle 90% of your guests as long as it’s created with a directional freezing method. Distilled water created the most visually distracting cubes, but is still acceptable to the vast majority of the population.
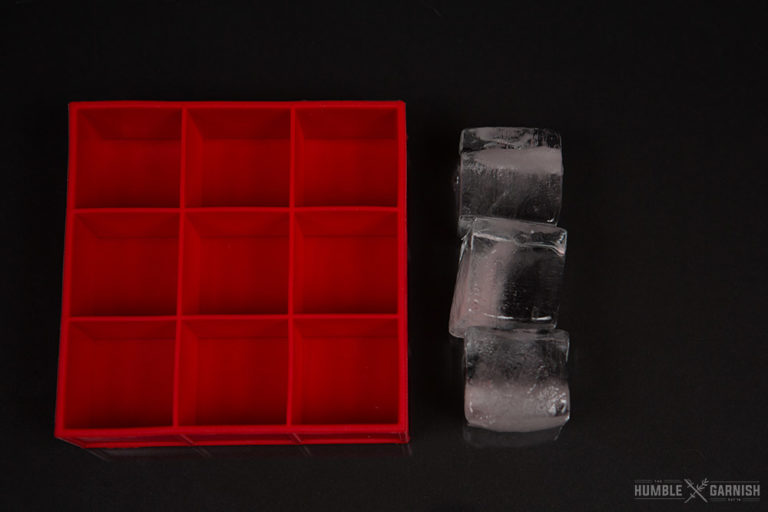
Perhaps it’s a bit of overkill at this point, but here are photos of various ice mold and water type combinations. It’s apparent that directional freezing is the ONLY way to get clear ice.
The Taste Test
I collected one sample of each ice type and allowed it to melt in order to give it a taste test. I’d summarize these results by saying, if the water tastes bad when it goes in, it’s going to taste bad when it comes out. (No surprises there.) The distilled water and the BLK water have a different mouthfeel than the others, and that was preserved. The best advice I’d give to ensure your ice doesn’t develop an off or freezer-burned taste is to make sure you use a quality water source, keep your molds clean and don’t leave them in the freezer when you’re not making ice with them, and make sure your freezer itself doesn’t have any odor issues.
Conclusion
To summarize the results, the single most important factor in attaining clear ice is that it be done through slow directional freezing. Water type and temperature will have a small impact on clarity, but the greatest impact it will have is that poor quality water will impart any flavors into the drink as it melts.
Here are the BEST molds for creating clear ice, along with a brief summary of what I think the pros and cons are of each.
For any of these molds, the choice in water type or preparation method had little impact on the resulting ice clarity, but will have a flavor impact as it melts. To make clear ice at home, the only worthwhile methods will incorporate directional freezing. If you would prefer to see these all in a chart, click here.
Cooler Method
Works great, but very labor intensive. The hand-cut look of the cubes is nice, but will not be worth the effort for most people. Reserve this method for creating cubes for punch bowls.
Buy a Small Igloo Cooler
True Cubes
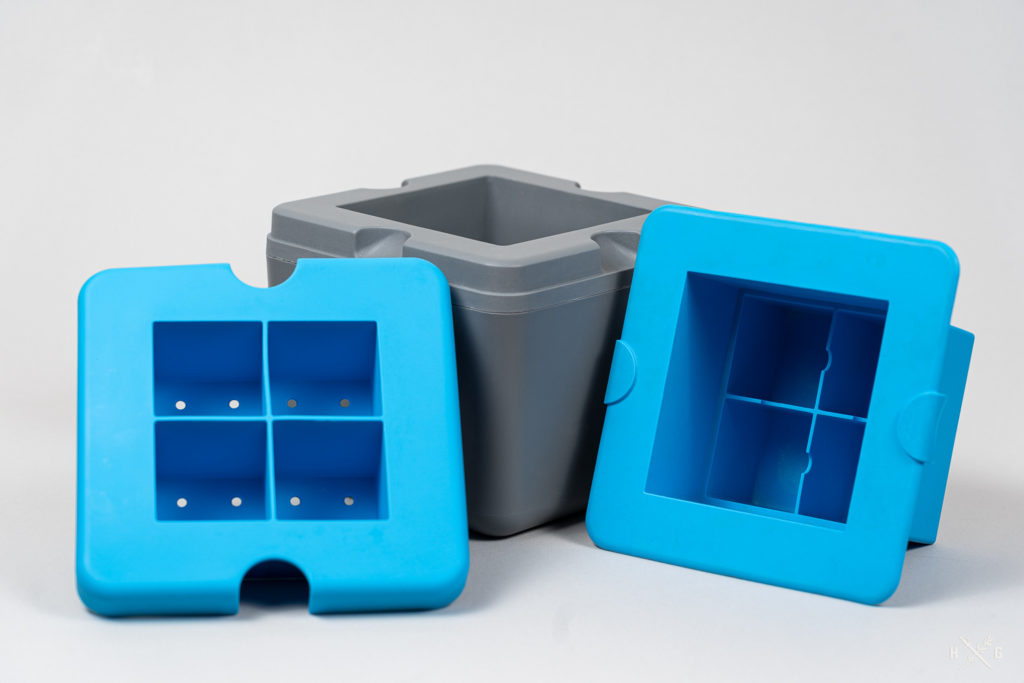
A solid build quality at a fair price. It only makes 4 cubes at a time and is a bit bulky, but I think it’s a great choice for many people. I’ve used this mold for years, and it has been very durable.
I use large Ziploc freezer bags to store the ice after it’s frozen.
Buy the True Cubes Ice Mold
OnTheRocks
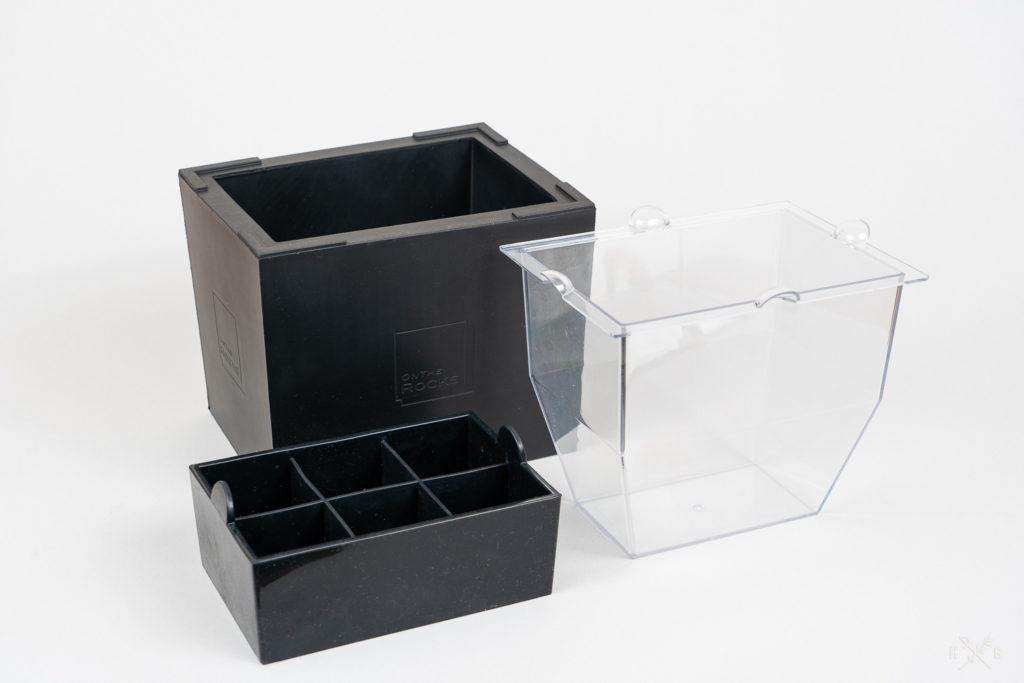
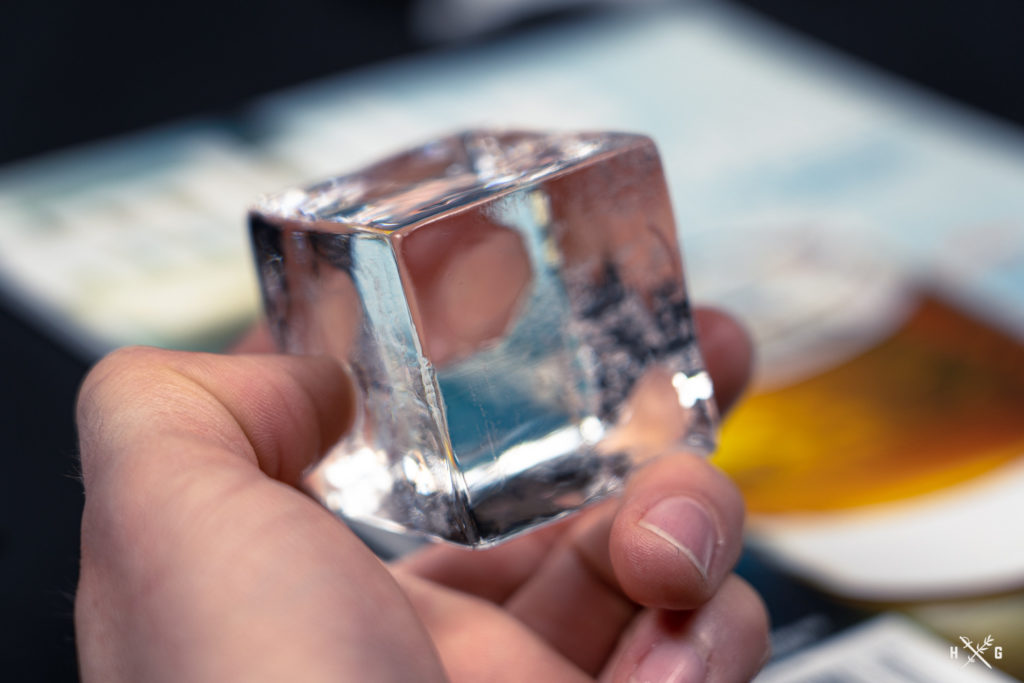
The OnTheRocks mold is my new (2023) personal pick for simple molds that you place in your freezer. I think it’s the perfect blend of capacity, build quality, and price. If you’re wanting to make clear ice spheres AND clear ice cubes, the bundle kit is the way to go!
The ability to purchase different mold shapes is nice, but they are a bit price at if you buy them individually. Buying them as a complete set will provide more value.
Buy the OnTheRocks Ice Mold
Buy the OnTheRocks Cube + Sphere Ice Mold
ClearlyFrozen
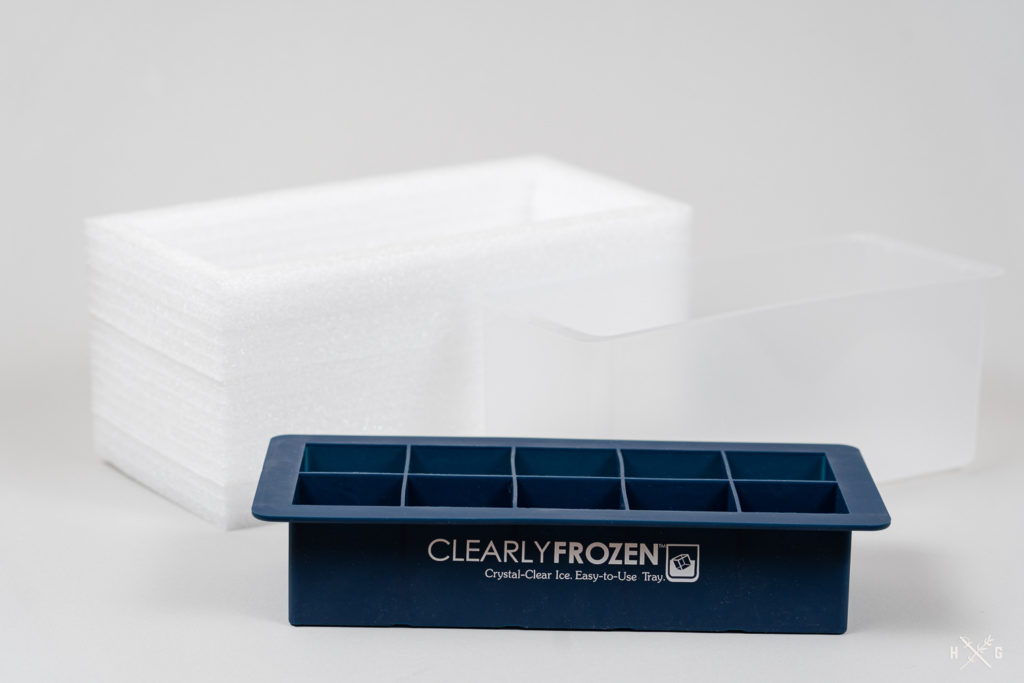
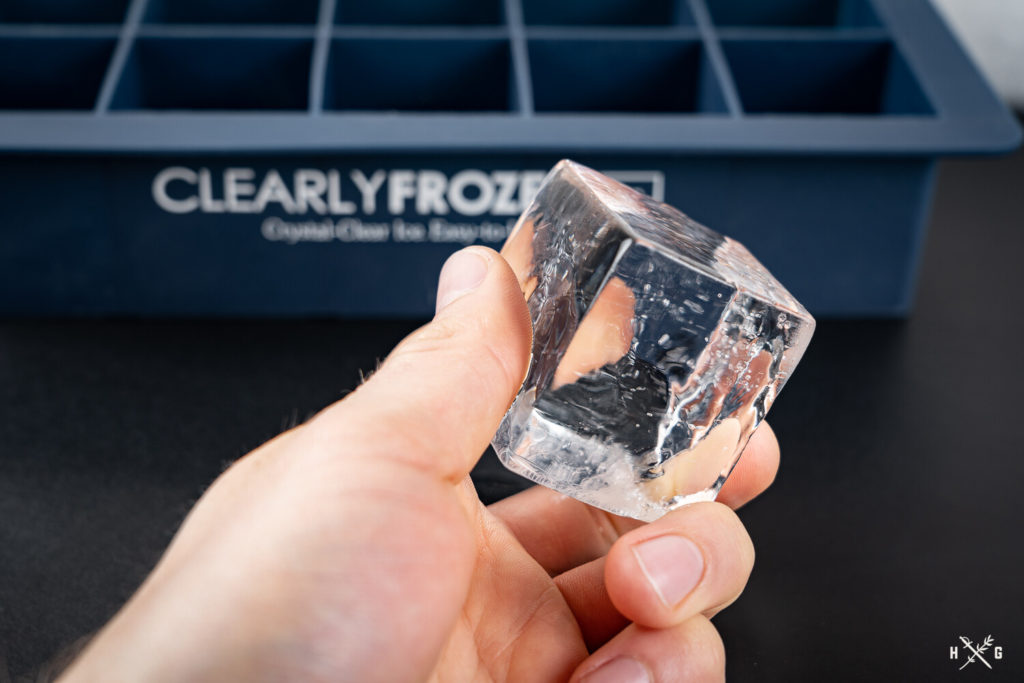
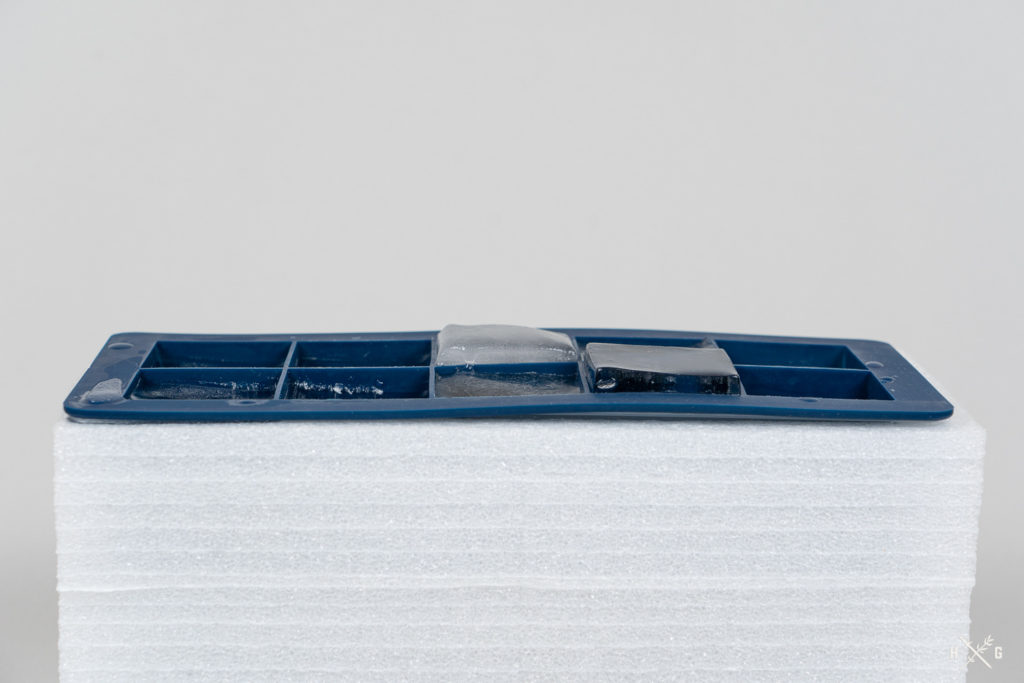
The best thing about this mold is that it makes 10 clear cubes at once. My only concern is the longevity of the materials, mainly the liner and, to an extent, the insulated shell. With proper care, it’s a great choice if you can handle it delicately.
As with all molds, it’s much easier to retrieve the cubes if you don’t allow all the water to freeze. The one minor downside to this mold is that if you wait too long, the cubes in the center will continue to freeze upward and become cloudy. My hunch is that it’s because that center portion is the last part of the water to freeze. This causes those cubes to push upwards out of the mold and include some of the water with trapped gases.
Buy the ClearlyFrozen Ice Mold
Wintersmith’s Phantom Mini
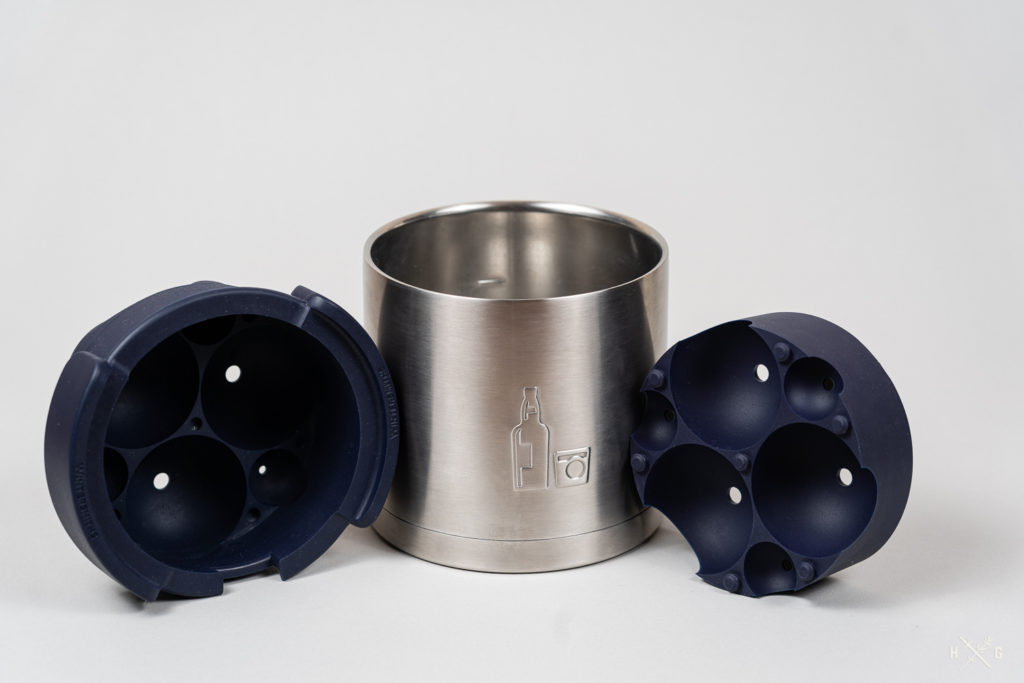
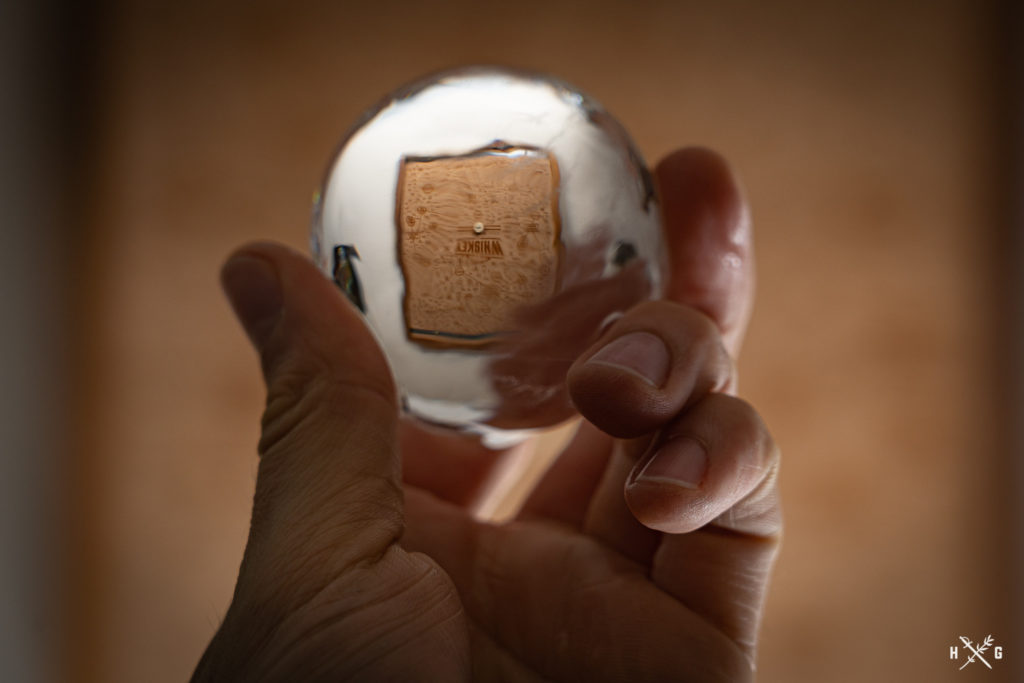
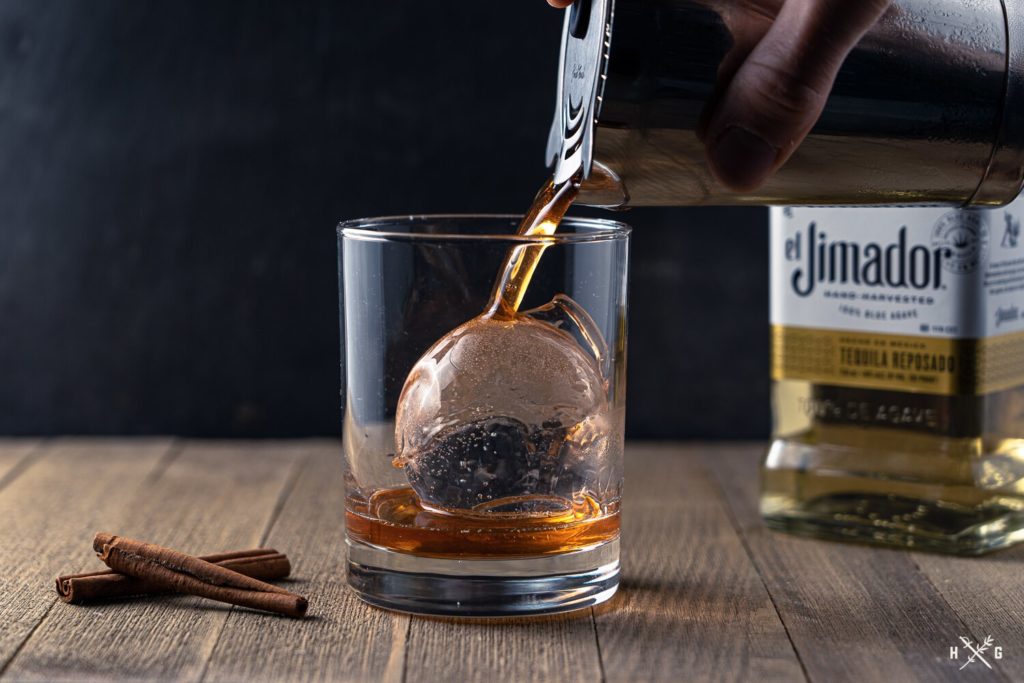
With Wintersmith’s you’re paying for a well-engineered piece of bar gear built from durable materials. It’s expensive and doesn’t make many cubes at once, but it will last. Note that the Mini only does spheres, and to make cubes you’ll need the full-sized Phantom.
Buy the Wintersmith’s Phantom Mini on Amazon
(If Amazon is out of stock, order it on Wintersmith’s)
Clear Ice Mold Comparison Chart
(Stay tuned in 2024! I’m adding more molds—sign up for the email list to stay in the loop!)
Ice Mold Comparison
| Ice Mold | Rating | Clear Ice | Pros | Cons | Price |
|---|---|---|---|---|---|
| OnTheRocks |
5/5 |
YES |
|
|
$65.00 |
| True Cubes |
5/5 |
YES |
|
|
$42.87 |
| Wintersmith's Phantom Mini |
5/5 |
YES |
|
|
$85.00 |
| ClearlyFrozen |
3.5/5 |
YES |
|
|
$37.99 |
| Eparé Clear Ice System |
2/5 |
NO |
|
|
discontinued |
| OXO Tray |
3/5 |
NO |
|
|
$6.99 |
| Tovolo Clear Ice System |
1/5 |
NO |
|
|
$11.00 (2-pack) |
| Tovolo Colossal Cube |
1/5 |
NO |
|
|
$12.00 (2-pack) |
| Dexas Silicone Cube |
1/5 |
NO |
|
|
discontinued |
| Prepara Ice Spheres |
0.5/5 |
NO |
|
|
$9.99 (4-pack) |
| Cooler Method |
4/5 |
YES |
|
|
$14.99 (plus bread knife and mallet) |
Congratulations! You’ve read this far and clearly (ba-dum-tssh) deserve a cocktail. Why not one that will showcase perfectly clear ice? If you liked this post, or want to see more like it, please give it a share using the buttons at the end of this post! If there is a specific mold I missed, feel free to mention it in the comments, on social media, or via email and I’ll consider adding it to these results. If you’re just getting your home bar set up, don’t miss this guide I put together which contains the basic set of tools you’ll need to get started. And don’t miss the resources at the end of this article for more info related to making crystal clear ice at home.
Cheers!
White Negroni Recipe
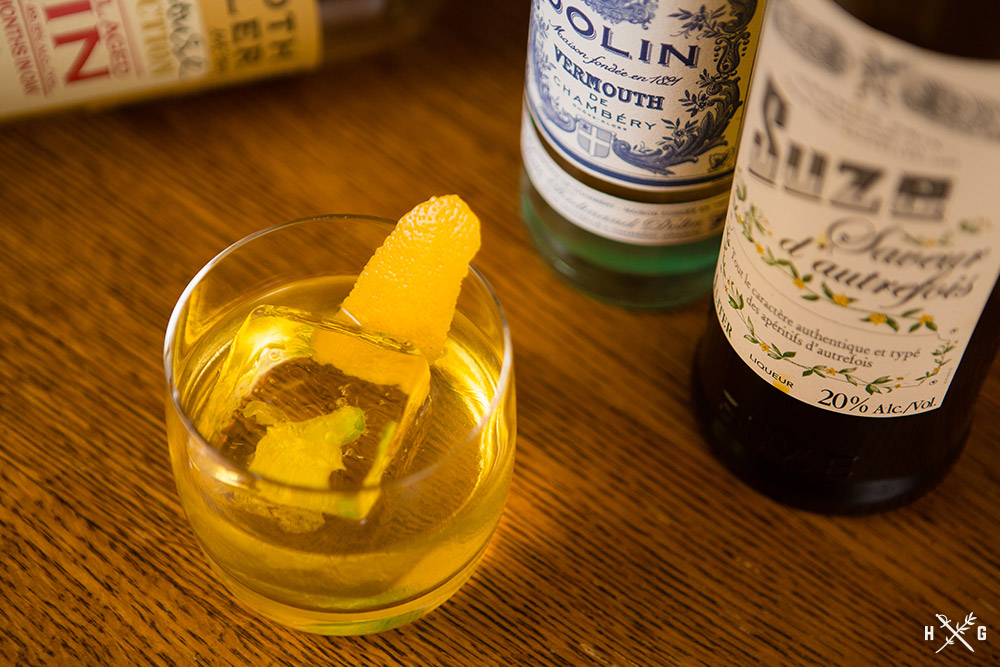
White Negroni
Ingredients
- 1½ ounces gin
- 1 ounce Dolin Blanc Vermouth
- ½ ounce Suze
Instructions
- Combine ingredients in mixing glass filled with ice and stir until chilled.
- Strain into rocks glass with ice. (A large cube if you’re feeling fancy.)
- Express lemon peel into glass.
Clear Ice Molds:
OnTheRocks – Crystal-Clear Ice Cube & Diamond Maker (a preferred mold)
OnTheRocks Cube + Sphere Ice Mold (preferred)
Wintersmith’s (Occasionally low Amazon inventory.) (a preferred mold)
True Cubes (a preferred mold)
ClearlyFrozen (a runner-up mold)
Cocktail Kingdom Professional 55mm Silver Ice Ball Maker
Other Molds
Eparé Clear Ice System (discontinued)
Dexas Ice-ology
Tovolo Sphere Clear Ice System
Tovolo King Cube Clear Ice System
Ghost Ice – A Great Large-Scale Solution for Small Bars
Miscellaneous
blk Water with Fulvic Trace Minerals
Prefer Nugget Ice? The GE Opal Countertop Nugget Ice Maker has you covered.
“Cooler Method” Gear
Anvil Ice Pick
Wooden Ice Mallet with Lewis Bag
Mercer Culinary Millennia 10-Inch Wide Bread Knife
Igloo Personal Cooler
References:
Liquid Intelligence – One of the most thorough and scientific cocktail books you’ll come across.
Academics (Camper English) – An Index of Ice Experiments – This is the most thorough list of what does and does not work that I have seen.
Camper English – The Ice Book
Freezer Harvest: A History of Ice Cubes
Dave Arnold – Does Crushed Ice Dilute More?
Cocktail Science: 5 Myths About Ice, Debunked
The Science (and Cost) of Craft Ice Programs
*Disclosure: This review has is constantly updated and has been for several years. Since this article has drawn attention, some of the brands mentioned have sent me products to review and feature. I always share my honest opinion of them after using them for awhile. The bottom line is that getting clear ice is about directional freezing. Any ice mold that uses that method will give you clear results. The main differences to observe are in build quality and quantity/shape of cubes created.
I created The Humble Garnish because I’m passionate about cocktails. Occasionally, I am provided with products for review or other perks. Many product links on this site are affiliate links that give me a very small kickback, and costs the buyer nothing extra. For example, as an Amazon Associate, I earn from qualifying purchases after a link leading to Amazon is clicked. Other links may earn me affiliate commissions as well. This helps offset the cost of creating content for the site – things like camera gear, software, alcohol, glassware. I have at times accepted and at other times declined free products. I promote what I love and use, and rarely will write about a product that I don’t appreciate or own. If I don’t like a product or service, I often simply choose not to write about it.
– Andrew



Love the blog, thanks for all the work! Just discovered it the other day and have already tried a few recipes that I’ve loved (Apparent Sour being my favorite).
Thanks, Paul! That is a great cocktail that I forget about far too often.
Cheers!
Hey, I almost spent way too much money for a Wintersmiths…I saw your response on the Amazon reviews and tracked down this article. I do most mixed cocktails but care deeply about presentation. I think I am sold on the true cubes. I have RO water and get close using the igloo method but want something simpler. Before I hit the purchase button do you have any further thoughts? Thanks
Hi, Annette! I’m still using the True Cubes mold, and it’s been working very well over a year now. I actually used it to freeze a bunch of specialty cubes last week for a photo shoot for a new vodka brand that I was involved with. It’s certainly a great mold! Wintersmith’s looks like a good option, but as you said, it is more pricey.
Thanks for reading, and feel free to reach out any time!
P.S. – Feel free to purchase via my Amazon link below. It doesn’t cost you any more, but helps me keep putting out new content. 🙂
True Cubes Clear Ice Cube Tray: 4-cube Tray – http://amzn.to/2w0QJLY
Cheers!
Thank you for such an in-depth review of so many cool products. I have been trying to find an affordable way to start making clear ice at home and now I have at least three I want to try. Cheers!
Thanks, Jenn! Glad you found it useful. ?
I absolutely love this article you’ve written and updated. I have a wintersmiths Clear Ice Pig Mold coming in the mail. I bought it to see how effective it would be. I use Glacio for my perfect clear spheres. As you’ve said, directional freezing is the way to go and pulling the ice before it melts is ideal. Any idea what “professionals” mean by allowing their cubes to “sweat” multiple times, (x3) to reinforce the durability of the ice and offer other benefits. I mean I’ve even seen Barebones Ice Company post about how they spend hours doing that to their ice in their cold rooms. Anyways, keep cranking out the content and stay safe out there!
Hi, Benjamin! Thanks for the kind words.
I’ve never heard of sweating ice multiple times, and am skeptical as to how that could improve the ice in any way once the water has already formed a crystallized structure. However, the tempering step is important if you want to make sure it stays clear, or when cutting down a large block into smaller cubes, as it will prevent cracking and make it easier to cut.
For example, when cutting down a large block using the cooler method, it could easily be 30 minutes before that block is tempered and easy to cut. It’s easy to notice when it’s ready once you get the hang of it. It won’t be frosty on the outside… it’ll have a nice clear shine and the exterior will be wet.
The smaller scale version of this occurs when you use one of the clear cube or sphere molds and pull it out to make a cocktail. Say you’re wanting to put a large clear ice sphere in a negroni. If you pull the ice sphere, and begin to immediately build the drink, it’s very likely that it will crack. However, if you give it 5-10 minutes, it will have tempered and not crack. One hack that works well is to start with the chilled ingredients for built drinks. So… for the negroni, add the sweet vermouth first as it should be coming from a fridge. Slowly pour it over various parts of the surface of the ice. Then add the Campari and vermouth. I find this works well if you’re feeling impatient, but still want that perfectly clear ice!
Cheers!
I am trying to find a way to get the ice out of some vanity ice cubes I have. They are molds of different animals, but the ise is then stuck, in the mold. Any thoughts?
Thanks
Troy
Hey, Troy!
I find that vanity ice molds can be challenging. Specifically if it makes small sized ice, and therefore a lot of detail is lost.
As for removing it from the molds, I’d say don’t be afraid of letting the ice stand at room temperature for 15-20 minutes before popping the ice out of the mold. Sometimes just a little time and patience helps to release them.
Great read-totally appreciate the time and effort you’ve put into this over a significant period of time!
I was gifted Wintersmiths the year Phantom came out. It is marvellous, however the most important thing I’ve learned is the realization that this takes dedication and time and scheduling to do well. And patience. Over freezing ruins the experience in some way, so it’s important to understand your ideal freeze times and stick to them-and they will vary from setup to setup. And then perhaps more importantly, the tempering. On Wintersmiths it’s a full hour on my counter every time before I even try. And if I do try too soon, it’s a nightmare. It’s such a rigid/robust mold that it just won’t release with any degree of ease. So that must be taken into account-once you accept and plan for all of this, it’s a dream. Vac seal the harvest and you’re set. I love my molds-Collins/spheres especially but have made use of all!
Very true! Sounds like you’re a pro at it. 🙂 I gifted two Wintersmith’s Phantom Minis this year and that was exactly what I told the recipients. Not to let it over-freeze. Good call on the vacuum sealer. I use a large Ziploc at the moment, but a solid vacuum sealer is the next gadget on my list. Thanks for the tip and for reading.
Cheers!
I’ve tried the tolovo and the Rabbit and the Rabbit made 4 regular clear cubes where as the Tivoli made one cloudy large cube. Maybe try the Rabbit next if you want to expand the list. Thanks for the article was great.
Cam
https://www.amazon.com.au/Rabbit-89060Clear-Tray-Gray-Blue/dp/B01MRM0CJI
https://www.amazon.com/Tovolo-King-Cube-Clear-System/dp/B01DC73LVM/
Thanks for the tip! I’ve been meaning to check out the Rabbit mold. Which Tovolo did you use?
Ignoring price, which of all the directional freezers do you think performs best / is most versatile?
Considering price, which of all the directional freezers do you think is the best combination of performance, versatility, and value?
Thanks.
Hey, Ross! Great question. After years of using several of these, and trying new ones as well, the OnTheRocks would be my pick. It’s well engineered and with the swappable inserts it can do cubes and spheres. The kit for both is $85, whereas the Wintersmith’s is that price for only spheres and produces 3. The OnTheRocks kit can produce 6 cubes or 5 spheres.
A follow up to my previous question (I couldn’t find a way to reply to your reply, so I’m starting a new thread…):
Wintersmiths also has a more expensive Phantom, which can make 7 large spheres or 6 large cubes (and has other molds available). How does that compare to the OnTheRocks, in terms of quality of ice, ease of use, durability, etc.? Yeah, it would be nice to save money, but, if the Phantom is better, a one-time extra $95 investment would be worth it to me.
Thanks again for sharing your knowledge.
They will both make perfect cubes or spheres. I love my Phantom Mini and would have gone with the standard, but I was trying to conserve freezer space. Wintersmith’s stuff is on the pricey end, but it’s worth it, in my opinion. The silicone mold parts snap into each other easily and the stainless steel base is solid. It’s definitely a small investment, but it will last.
Cheers!
thank you for great posting.
there are 3 companies make clear ice ball maker with their brand.
wintersmiths, polar ice and Jewelice . each has own pro and cons.
I prefer Jewelice for perfect ice ball comes all the time and easy to
pull the mold out and their design is very unique.
now they can custom your brand and logo into their ice ball ~~
https://www.instagram.com/jewelice99/
Thanks for the tip, Charles! I like how you can add custom text or a logo! If you want to send one my way for review, I’ll gladly add it to the article. 🙂
Cheers!
How do I acheive this look? I want a script L though?
See Montage Laguna Old Fashioned. It has there logo M on a clear block of ice.
Hi, Paula! Once you hace your clear ice cube (or sphere) you simply need to use an ice stamp. There are several companies that make them, but I’d suggest Vault Ice.
I have a Crystal Clear clear ice maker (8 rectangular cubes) but have not been able to produce totally clear cubes.
I have tried different locations in the freezer (upper and lower).
I keep the freezer at 0 degrees F. I use filtered tap water (carbon filter only)
I still get cloudiness in the bottom fourth of my cubes.
I have tried leaving the molds in from 24 hours to 48 or more hours and get similar results.
What am I missing?
Hey, Phil! No worries—fortunately there is a simple solution.
You don’t have to worry about using filtered water. The location in the freezer doesn’t really matter either. The way these type of molds work is through directional freezing. So, impurities are pushed to the lower level of the silicone mold. With this design, you’ll always want to remove the mold before all the water is frozen. The lower mold sections will always be cloudy and that portion is meant to be discarded.
I think you’re referring to the chonky blue mold, right? That one is reliable and well built. For silicone molds, I’ve really liked the OnTheRocks mold lately, as it also can do spheres. If you want an upgrade pick, go for the Klaris (full review here). It’s actually an appliance, but saves you the hassle of the timing it just right or risk having all the hard to remove cloudy ice. I have a 10% discount code as well, with code HUMBLEGARNISH10.
Hope that helps.
Cheers!
– Andrew
Hi there i’ve read that the plastic container of the plastic insert cracks if you forget to take it out after 24hours and the company does’nt do replacements. I’m considering between the true cubes and the onTheRocks system but find myself leaning more towards true cubes as it seems to be more durable. What are your thoughts on this please
Hi, Tom! Great question. After having these molds for many years, some are prone to cracking, but I haven’t had any issues with the OnTheRocks. Simply leaving it in for 24 hours won’t cause it to crack, but over time it is added wear and tear. I found myself ditching the chonky True Cubes and opting for the OnTheRocks. Plus, that mold offers different inserts so you can do spheres.
For an upgraded pick, my vote goes to the Klaris.
Hope that helps!